| In this tutorial we are going to create a store for your area so that players can buy and sell things to the merchant. First thing to do is to build the shop itself, which I will leave you to do, but if you are unsure how to create and interior then please go here.
Once you have the shop how you want it (in this tutorial I am going to use the scenario of a Blacksmith - so my area is full of armour/weapon racks, forges and an anvil, etc). Next thing we need to do is to place our merchant in the shop - after all need to buy and sell to someone. You may have a character in mind, if not then make a character and again if you are unsure then please visit here.
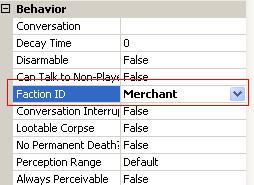
Once our character is placed we need to select it (Make sure the Select Objects is selected in the Filters toolbar and then left click on the creature) and then look at the properties of the creature. You need to change the Faction ID of the creature from whatever it is currently to Merchant (The Faction ID is found under Basic):
Next thing we need to do is to give our Merchant a conversation so that it can talk to the players. To do this we need to select the Conversation tab, which you should notice is the next tab along from where your areas are listed. Once you have clicked on the Conversation tab, right click in the area within the tab and then left click on Add. You should now see in your conversation list an item called Conversation1 and also in the main pane an item called Root. Click on Root so that it is selected and then right click on it and then left click on Add and you should see the following popup: 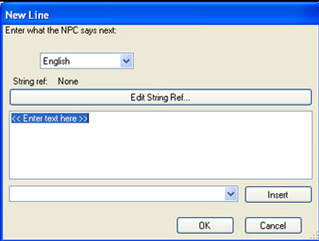
Where it states "Enter text here", replace it with what the shopkeeper will initially say to the player, something like "Welcome to Thunderhammer's shop" and then click on OK. You will see what you just typed appear just below the Root and now our next step is to type in what the player will say to the shopkeeper.
To do this just right click again in the white area underneath our Welcome message and then left click on Add. You will notice that this popup is very similar to our last one, except that in the top left hand corner it mentions "Enter what the players says next:". Enter something along the lines of "Hail and well met. I would like to see what you have for sale" and then click on OK. Next thing we need to do is to give the player the option to pull out of the conversation just in case they accidentially click on the NPC or have had a change of heart. Left click on the "Welcome to" line (You should see that the text is in red - NPC lines are in red and Player conversations are in Blue) and then in the white area beneath the conversation right click and then left click on Add. Again the top left hand side will state "Enter what the players says next:" and replace the "Enter text here" with "Sorry to have troubled you, but I am not interested" and then click on OK. The conversation should look something similar to this: 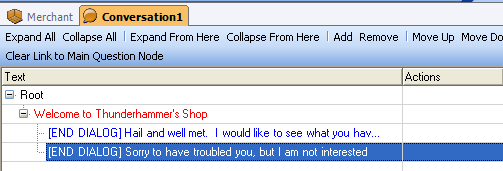
Now left click on the "I would like to see what you have" and then right click on the white space below again, making sure that the Action node is opened and then click on Add and then click on OK. You will now see a line in between the two END DIALOG lines which starts with CONTINUE, with this line selected look below and you will see Add, Remove, Move Up, Move Down, Preview:

Click on the Add button and you will see the following: 
Under script, click on the drop down menu and then from the list choose the "ga_open_store" (Double click on it). Now click on the Refresh button next to the script and you will see "sTag (String)" appear, but leave this for now. Next click on the Blueprints and then the Stores button: 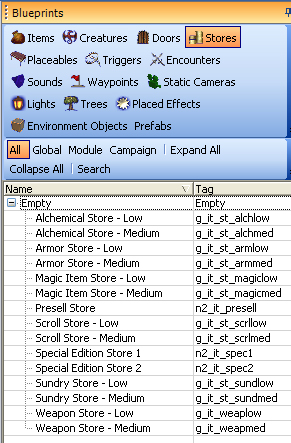
There are a number of predefined stores to choose from, so for our Blacksmith example I am going to choose the Weapon Store - Medium. You can see the tag for this store which is g_it_weapmed and you will need to type this tag into the sTag (String) box, like so: 
With that done we can close the conversation and we will be prompted to save the conversation so click YES. Now the name of our conversation is Conversation1, which is not very descriptive so lets change this by renaming it. Right click on Conversation1 and then left click Rename, for this tutorial I am going to name it ThunderStore. Now we need to add the store itself to the area so choose the store (in this tutorial it is the Weapon Store - Medium) and paint the store underneath the storekeeper like so: 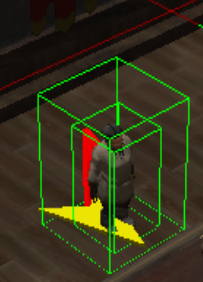
The last thing we need to do is to attach the conversation to our storekeeper so left click on the storekeeper so that it is selected and then change the conversation field under Behavior by left clicking in the field and then left click the downward arrow. You will see your conversation in the list so double left click on it and the field should look like this: 
Now save the area and run the module. TIP: You will notice that the conversation acts through a cut scene, which may not be everyones cup of tea and maybe tedious after visiting the storekeeper on the 15th occasion. If you want to change it then open the conversation and look at its properties. Under Behavior change the Neverwinter Nights 1-style Dialogue to True as shown below: 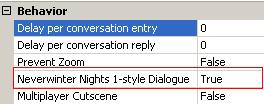
|