| New area transitions allow the player to move from one area to another by clicking on the Area Transition trigger as shown below: To place a New Area Transition Trigger go to your Blueprints - Triggers and then New Area Transition: 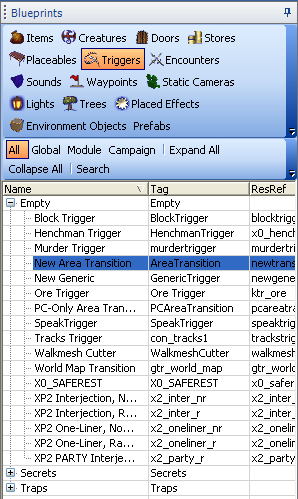
Now move your cursor to the area preview window and you will see the cursor is now a cross. Click for example the four corners of a square and you will see something similar to this: 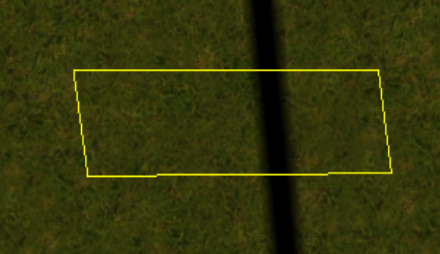
Please note that the bigger the trigger then the bigger the Transition placeable will be to the player. The next thing to do is to paint a waypoint where our player will end up when they go through the New Area Transition. So go to the destination area, click on Waypoints in your Blueprints and then click the plus sign of Empty and then Waypoint: 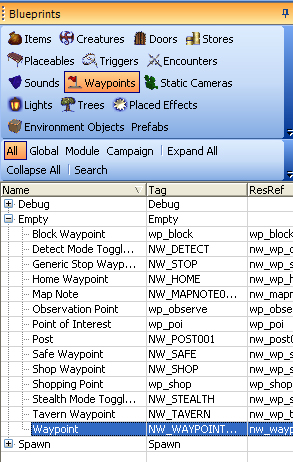
Now click on the preview area where you want the player to appear and also you can move the waypoint so that the player will face in the direction that the waypoint is pointing to: 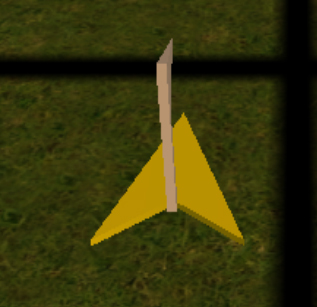
The next thing we are going to do is to give this waypoint a unique tag so that when the player hits the New Area Transition, they will appear at the right waypoint. For our example I am going to call the tag area2 as you can see here, waypoint1 may be a better name, but the naming convention is up to you: 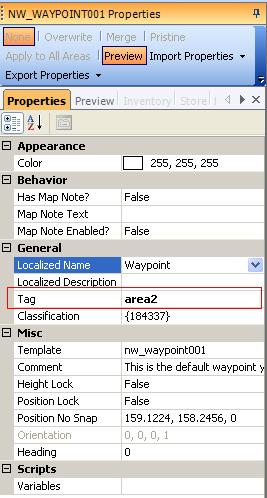
Now we need to go back to our New Area Transition trigger and point it to this waypoint. To do this use the Select Object in the Filters Toolbar and then click on the trigger (it should be highighted with a green outline). Now look at the properties of the trigger and it will look like this: 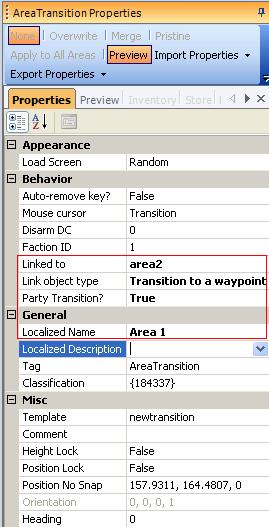
Locate the "Behavior" section, and set the following fields:
1. Link object type. Determines whether your area transition will send the player to a door or a waypoint. From the dropdown menu, select "Transition to a door" if you want the player to be sent directly to a door object. Select "Transition to a waypoint" if you want the player to be sent to a particular placed waypoint. (If you select "No Transition," then your area transition will do nothing.)
2. Linked to. Sets the tag of the door or waypoint destination. [Note: You must be certain that this tag matches the tag of your door or waypoint exactly, and that this door or waypoint is actually placed somewhere in your module.] In our example this must be set to area2
3. Party Transition. Determines whether the entire party is sent to the destination door or waypoint. If this field is set to true, the entire party will be transitioned to the new area when any one member of that party enters the area transition trigger. If this field is set to false, and a member of the party enters the area transition trigger, that member will be sent to the new area, but the other party members will be left behind. In general, it is a good idea to set this field to True.
4. Localized Name. This is the name that is displayed to the player. Maybe use it as a description of where the player might be going (i.e. to the harbour). Now you should test to see if it works and if it does not then double check the tags and there spelling etc...: 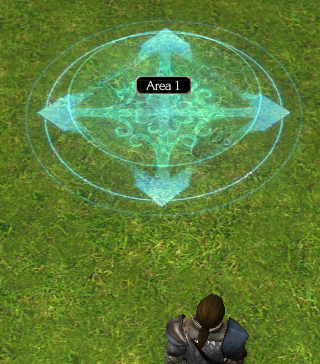
|