| For this tutorial I am going to assume that you know how to navigate around the toolset (see here) and how to move around the preview area (see here). I am also going to assume that you know how to create an area (see here). The first thing you probably need to do is to get a piece of paper and a pencil. Start by drawing a sketch of the area as there is nothing worst that sitting at the toolset and wondering what to construct. Once you have an idea of the area you want to make, start thinking about the textures that are going to be used. In particular the global texture, to change the global texture, click on the Terrain tab in the Blueprint pane and then click on Texturing: 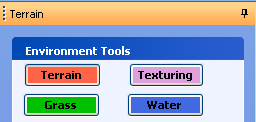
After clicking on the Texturing, you will see in the middle of the Terrain pane a section called Terrain Texturing: 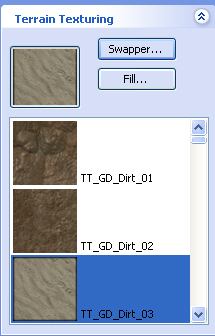
Left click on the terrain you want to be the "global terrain" and then click on the Fill button. You will then be presented with a warning "Are you sure you want to fill the entire area?". Click OK and the textures will be swapped. 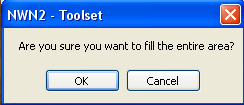
Shaping the terrain Lets talk about the different tools that we have at our disposal before we actually do anything to our area:
The Environment Tools have 4 buttons as you can see above. When you click on the Terrain button you will see the following tool pane: 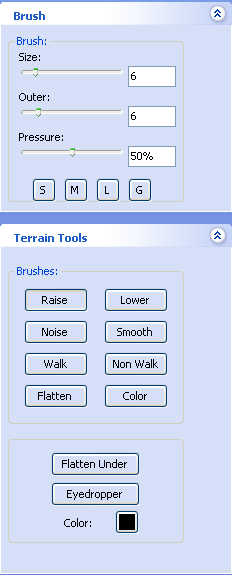
At the top of the pane we have a section called Brush which has the following options:
1. Size. This is the area of the brush that paints at the full pressure setting. Indicated by the inner circle of the brush. (from the bioware forums I believe the sizes are in meters)
2. Outer. The "drop-off" of the brush. Indicated by the outer circle of the brush. A large outer setting will make more subtle hills when painting terrain and more blended textures during texture painting.
3. Pressure. In terrain building this will affect how extreme the sculpting of the terrain will be. For subtle changes use a low setting under 20%. For texturing it controls how much the selected texture mixes with the already painted textures. As an example if you have pressure set at 50% it will mix the selected texture 50% with any other textures in the currently affected area. Underneath these tools are predefined sized brushes from small (Inner = 1, Outer = 2), medium (Inner = 6, Outer = 6), large (Inner = 10, Outer = 10) and lastly gigantic (Inner = 15, Outer = 15). Next are the Terrain Tools: The terrain tools allow sculpting terrain. You can paint hills, chasms, mountains, roads, etc. It's the basic tool section for laying out your map.
Brushes
1. Raise/Lower. As the name suggests the brush will raise or lower the terrain in the selected brush area. Use the pressure setting to control the level of adjustment. Lower settings are suggested for fine control.
2. Noise. Adds a noise to painted area to break up flat sections of the map. Please note the tool does not work across tile regions and can break sections. If this happens use the Smooth tool to clear out disjointed tile regions.
3. Smooth. Smoothes out a section. Great for flattening out peaks or building terraced hills.
4. Walk/No Walk. Used in conjunction with level baking to control character movement on a map. See Level Baking for more details.
5. Flatten. This control has "Height" instead of "Pressure" and will force the surface mesh to flatten at the set height. Used with the Eyedropper tool allows good control on maps you have much elevation changes.
6. Color. Used to tint the ground textures a certain color. Very useful in adding detail and modeling to existing textures. Using a medium brown to darken ground around water or in crevasses along hills helps break up uniform patterns. Don't underestimate this tool! Great to use after texturing is completed to "weather" a map.
Other Options
1. Flatten Under. By selecting a placeable object and pressing this button, the ground will flatten to the base of that object. Good for use with buildings to match the ground to the floor.
2. Eyedropper. Used with Flatten to define a height level to flatten too. Very useful for making terraced hills or raising sections of the map quickly.
3. Color. Used with the Color Brush to tint ground textures.
Now we know what the tools should do we can start to make changes to our flat surface that you can see in the area preview pane. The first thing we will talk about is how to raise the terrain in our area. I would suggest that you start by going to the very top left or right hand corner of the area to test these tools and be sure you have the right height. Before you start, why not place a human NPC (Blueprints, Creatures, NPC and then choose say the Commoner) in the area just so that you can get an idea of scale, etc.. Now to change the terrain make sure that you are on the Terrain tab within the Blueprints pane and the Paint Terrain option is hightlighted in the Filters toolbar (left click on it if it is not). Then move you cursor over to the area preview and you should see your cursor change to a pen symbol and two circles will appear (unless Outer brush is set to zero) like so: 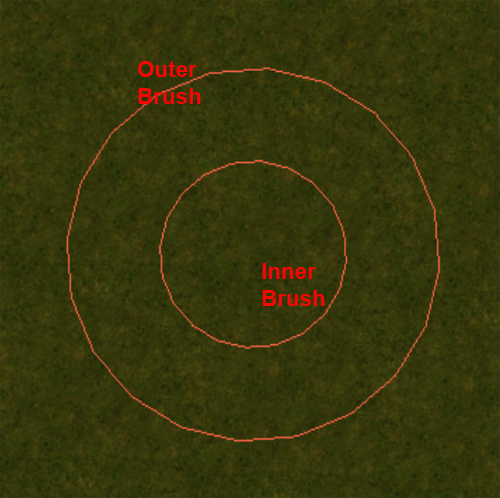
Now left click on the area and keep the left click down until you get the desired height that you are after: 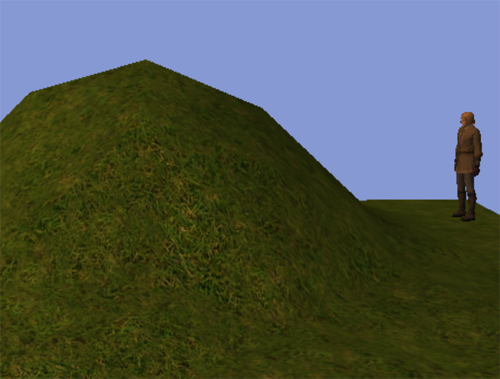
The next thing you might want to try is using the Flatten and the Eyedropper tool, so select the flatten button and then the eyedropper button and you will see the cursor change to a cross hair. Now click near the top of the raised terrain you have just created and this tool allows you to select the exact height you are going to use as a default height for whatever you paint now. When you paint, you will get a sort of flat-topped hill/plateau (see below for an example). Use this to lay out all of the raised terrain on your map. You do not need to stay at this height you can raise the terrain on top of the hill/plateau and apply the flatten and eyedropper method to build a second tier. You may also want to use flatten for sunken/worn looking terrain, so that you can make a path of a road. 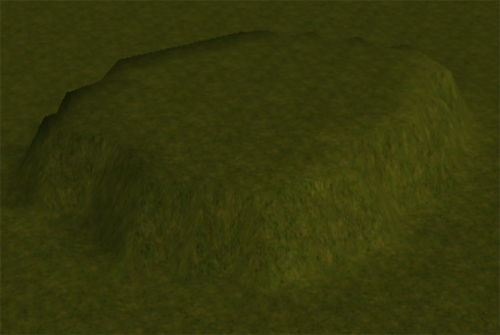
Now that your armed with how to raise terrain, you can also use the lower button to drop the terrain so you should be able to carve out the general appearance of your area. Do not worry about making mistakes as you should go back over your areas to "fine tune" your environment. If you want gentler hills then increase the outer brush size and if there are too many "flat" areas then use the noise tool as that will add bumps in the terrain. Use the 'smooth' tool to reduce the harshness of your terrain. If you have jagged edges or a lot of cliffs from the 'flatten' tool you used earlier, smoothing is a good way to remove such harsh features that you don't desire. You should also use the smooth tool to check the tile edges - noise will sometimes cause these not to match heights properly, and you can smooth these oddities out. Size (From Gilthonym and Vance McFadyen) Let's do an experiment: Set 'Size' to 6 and 'Outer' to 6. Then left click on the map and create a hill.
Now, change 'Size' down to 2. Create a second hill on the map next to the first one. They should look something like this: 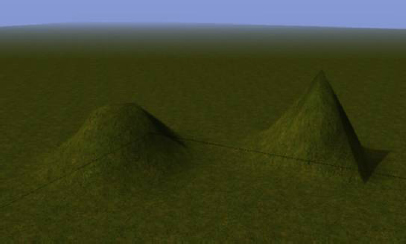
See how the first one has a flat top, while the second one is sharp. The smaller the size, the sharper the hill. Outer Experiment number two. Change 'Size' back to '6' and set 'Outer' to 6. Paint a small hill. Then change 'Outer' down to '1' and paint a second hill next to it. It should look like this: 
See how the hill on the left, the one with an 'Outer' of 6, is wider than the hill on the right, which has an 'Outer' of 1? Vance has recommended setting the 'Outer' to double what 'Size' is - so if 'Size' is 3, set 'Outer' to 6. This looks nice. But play around with 'Size' and 'Outer' to get the terrain looking how you like. Pressure
The third property, 'Pressure', is the strength of the effect on the terrain. The higher the pressure, the greater the effect. Take a look at another of Vance's screenshots: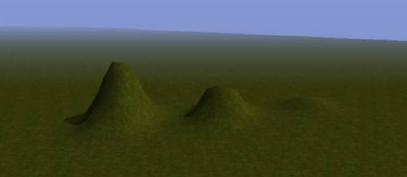
All three hills were made with 'Size' of 6 and 'Outer' set at 6. However, for the first hill, on the left, pressure was set to 100%. For the middle hill, 50%, and for the third hill, 10%. 'Pressure' is very important - it will heavily control the final effect!
Also, the longer you hold down the left mouse button, the more effect the brush will have. So hold down the button for strong effects, and just click the button for fine tuning terrain. Mountains Vance McFadyen suggests for nice looking mountains, you create a plateau at about 1 metre, then another one overlapping that a bit higher, and another one overlapping that a bit higher, until you reach the desired height. Then use the 'Smooth' brush with a pressure of about 10% to smooth it all over. An example final effect is shown here: 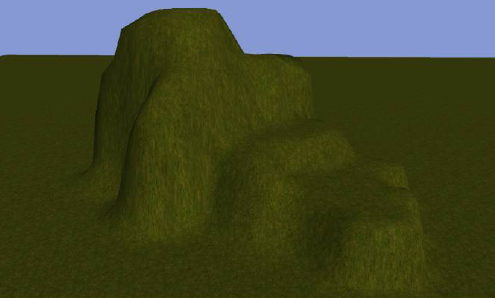
|