| Walkmeshes are a very important part of your module building as this will dictate exactly where the player can walk and where they cannot. To see exactly where the player can walk in your area you need to click on the Surface Mesh Filter button: 
And the image below is a sample of what you will see in your area 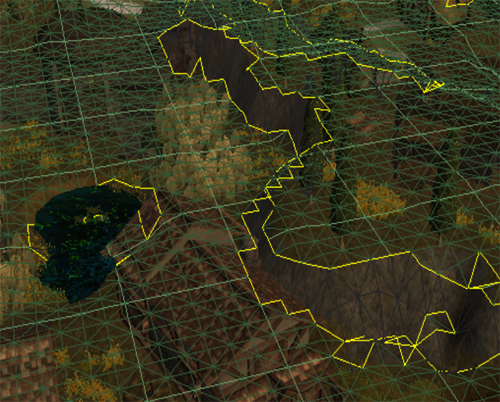
As you can see from the picture above we have green lines (these mark the walkable areas), black lines (these mark the non walkable areas) and finally we have yellow, which mark the boundaries between the walkable and the non walkable areas. The toolset automatically makes areas that have steep heights or falls as non walkable. In the picture above there are at least two parts that are non walkable, the pond and also my rock face.
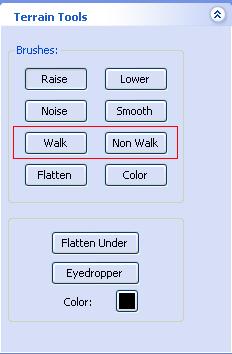
From the picture you can probably make out my pond (left of the picture), which has some yellow lines around it. Some of it is walkable and the rest is nonwalkable, however I want to make the pond totally non walkable. The first thing we need to do is to select the Non Walk button (do not forget to select the brush size) and then paint as if we were painting a texture.
The pictures below show the Surface before and after I started painting using the Non Walkable tool. Do not worry if you make a mistake as you can always correct them by using the Walk button and painting in the same way. 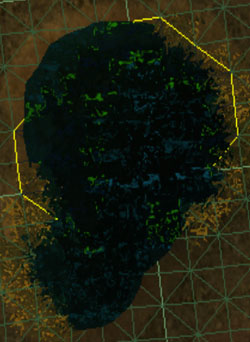 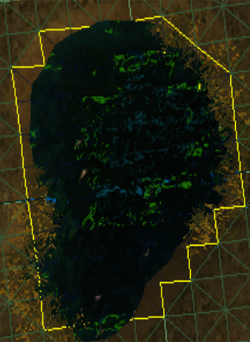
The Surface Mesh is also helpful for when you are using your other Terrain tools as it will show you straight away what effect the tools you are using are going to have on the player (i.e. whether they can walk on that area or not). For example if you are creating say a slope and you are using the smooth tool you can see whether the player can walk up that slope.
It is advisable to paint "Non Walk" over large areas of non accessible areas since it will make the baking process much faster and generate a smaller area file. Walkmesh Cutter (Trigger)
Click here for information about Walkmesh trigger. |