| This is an addition to Veragoan's Waterfall tutorial, which can be found here; it is therefore recommended you read that thoroughly through before looking at this. Also I'm assuming you have some knowledge of how the toolset works in this.
Another way to create a decent looking waterfall without toying with plugins is as following:
Note: This works best for smaller waterfalls on rivers and the like.
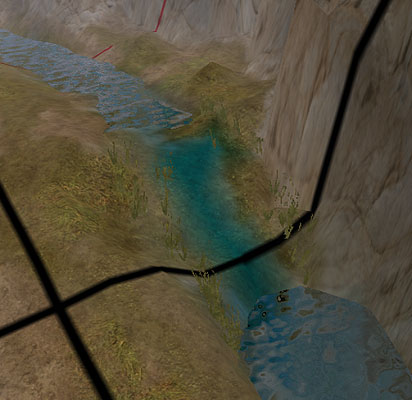
Step 1.
First of all get your terrain shape in place, unlike in Veragoan's example above, your two water levels should not line up; you are going to need a slope part between them to make this work.
Once you have gotten the terrain sat, add some textures and paint a blue colour where you want the waterfall to run.
If you look at the gridline here, it is placed a bit below the middle of the slope where the waterfall is going to be.
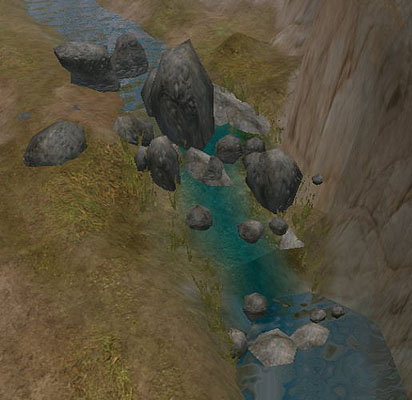
Step 2.
Now in order to cover up the edges of the first water level and to make the waterfall seem more realistic we'll want to fill in with some stones. In this case I have scaled some of the larger the stones in order to add several smaller stones to the slope.
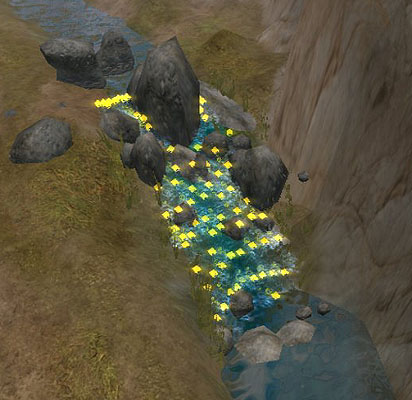
Step 3.
Now we want to fill in with the effect that is going to make the actual waterfall: The Placed Effect, Fountain. If you look at the fountain effect you will see it isn't awfully large, therefore we need to place a lot of them to make it look decent.
Start from the bottom where the water meets the river: Place your effect a bit above the water on the slope, raise the placed effect so you have the 'splash'-end meet up with your water level. Now height lock the placed effect (Properties - Mics - Height Lock: True) then cope the placed effect (CTRL+C) and paste it again so you have it on your cursor. (CTRL+V) Now you fill out with the effect in a horizontal line across the lower end of the slope where you placed the first effect.
Now move up a little on the slope, place a new Placed Effect, Fountain , adjust the height so the 'splash' this time meets up with where your lower line starts, height lock the effect again and copy - paste, fill out a horizontal line.
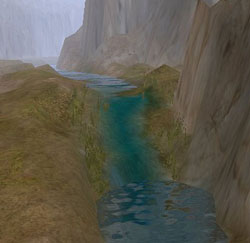
You continue this way all the way up the slope, in order to have some variety in how the water falls you can move some of the placed effects around a little. When you are done it should look something like this:
Now try and turn the placed effects helpers off in your show/hide function in the toolset and see the final result:
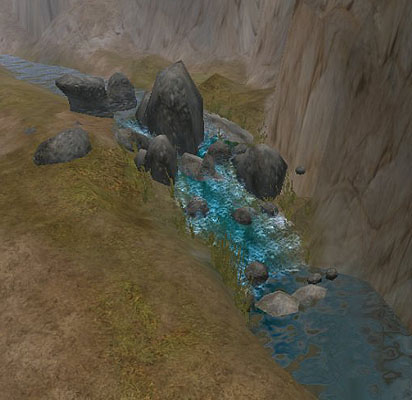
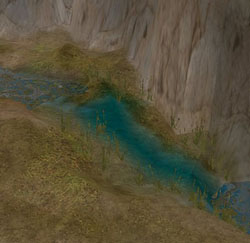
Tip: Remember to adjust the ripples on your two water levels so you create the effect of a running river. |